



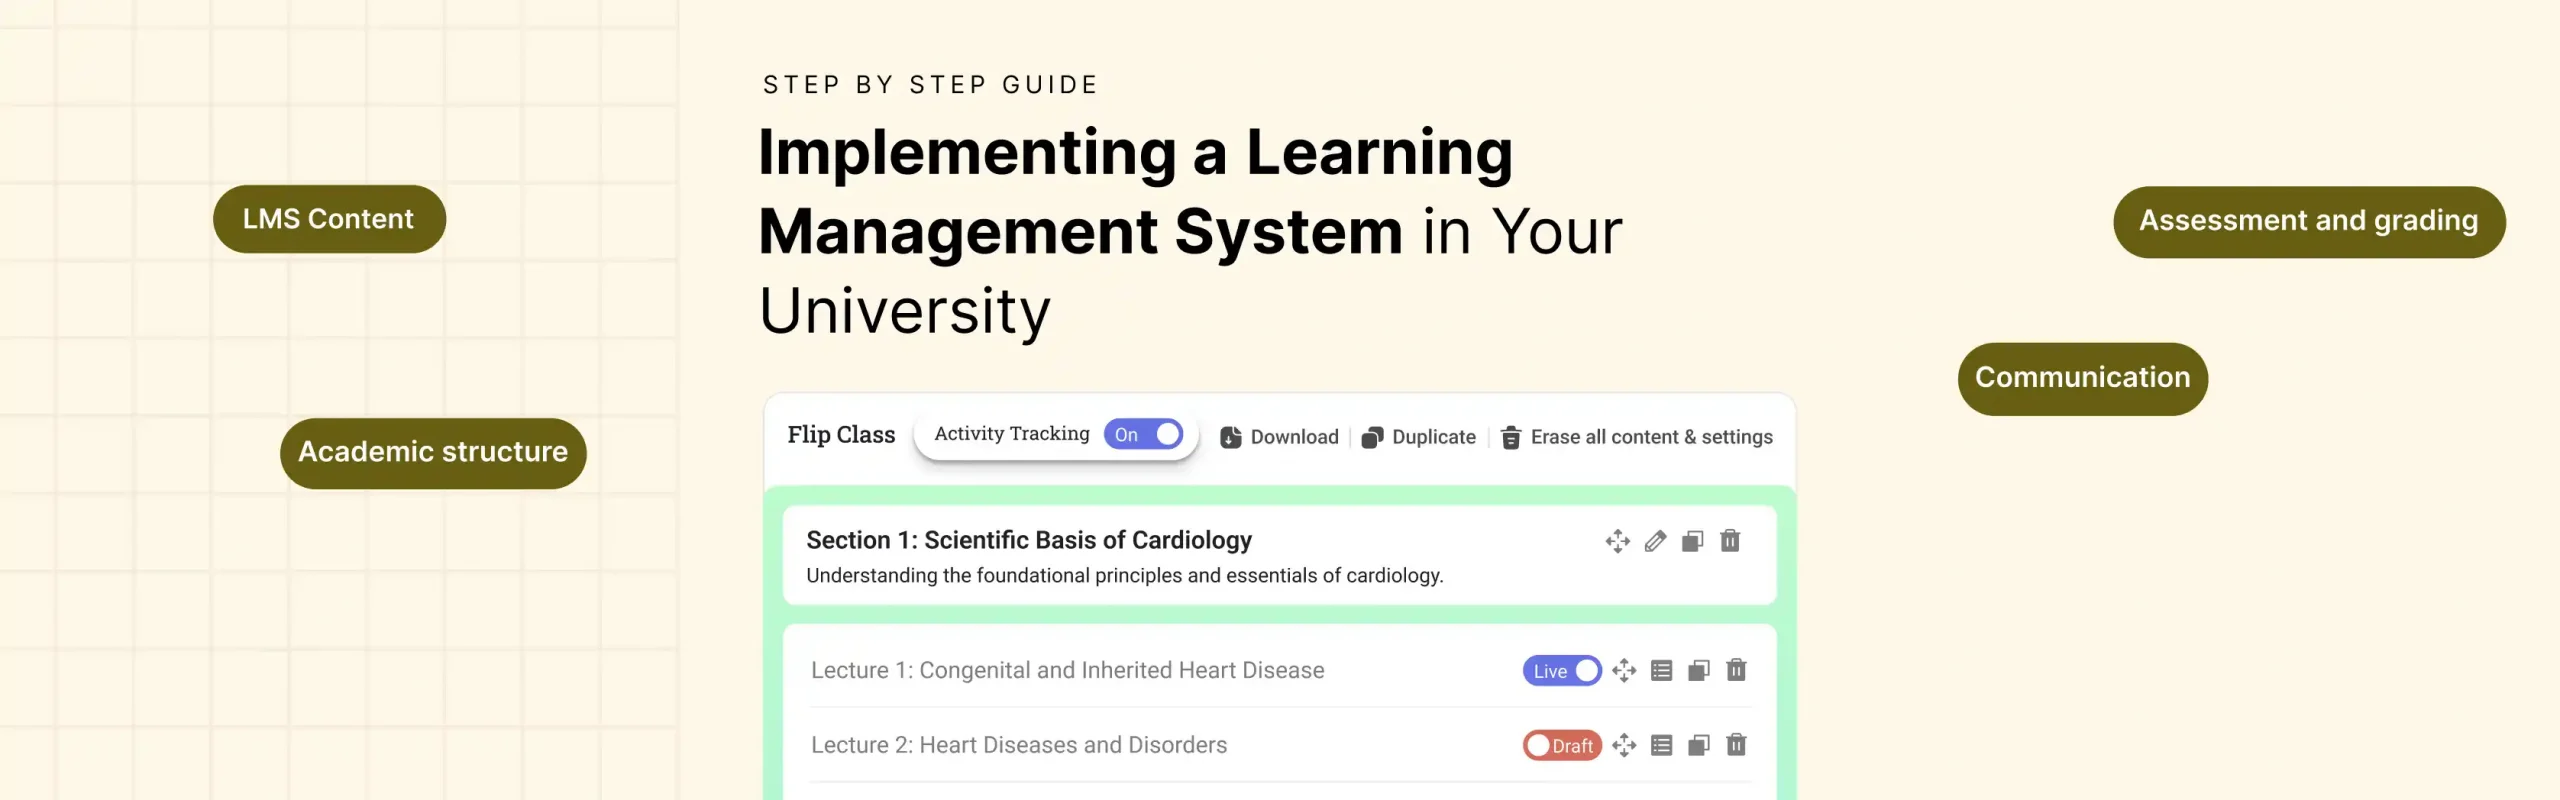
Learning management system implementation is where most universities either set themselves up for three smooth years or three painful ones.
This guide walks through the full Classe365 LMS implementation process. Every section below covers what to configure, in what order, and what each screen looks like when you open it. If you are evaluating a learning management system for universities or midway through a rollout, this is the reference to keep open.
The LMS implementation steps below cover the admin dashboard, student enrollment, attendance, recruitment and forms, fees and invoicing, fundraising, and notices. Each section includes the exact fields, toggles, and configuration options visible in the platform.
For a feature-level overview before diving into implementation, see our guide to must-have LMS features for higher education.
The LMS Implementation Checklist
Use this as a go/no-go checklist before taking the platform live.
Academic structure:
- Academic sessions created
- Departments, classes, sections, and subjects defined
- Core vs. elective subjects marked
- Student enrollment limits set per section (if applicable)
- Default terminology updated to match institutional vocabulary
Student enrollment:
- At least one admissions form built and tested
- Form fields mapped to SIS profile fields
- Enrollment workflow stages defined and color-coded
- Notifications configured for each workflow stage
- Test enrollment completed end-to-end (form submission through to SIS record)
LMS content:
- Subjects auto-populated from academic structure confirmed
- At least one flip-class section and lecture created
- Content uploaded (video, document, or presentation) and tested in-browser
- Activity tracking toggled on with minimum completion thresholds set
- Quiz created with at least two question types and linked to gradebook
Assessment and grading:
- Grading scales created (letter, GPA, rubric, percentage, or manual)
- Subject weightages configured per department
- Grading periods (terms or semesters) defined
- Report card template selected and customized
- AI evaluation tested on a sample student group
Attendance:
- Attendance statuses defined (Present, Absent, Tardy, custom)
- Percentage splits set for partial statuses
- Subject-wise or session-wise attendance mode selected
- Notification preferences configured (email, SMS, WhatsApp)
- QR/barcode ID cards generated (if using scan-based attendance)
Fees and invoicing:
- Fee categories and templates created
- Line items, tax, and discount rules configured
- Payment gateway integrated (Stripe, PayPal, or Classe365 Payment Bridge)
- Invoice template selected or customized
- Test invoice generated and payment recorded
Users and permissions:
- Permission groups created for each role
- Read/write access defined per module per group
- Teacher accounts added and assigned to subjects
- Parent accounts linked to student profiles
- Login invitations sent to a test group
Communication:
- Notice templates tested (with audience targeting confirmed)
- Email and SMS notification templates reviewed
- WhatsApp integration configured (if applicable)
Go-live readiness:
- Pilot cohort completed the full pipeline without errors
- Bulk student data imported and verified
- White-label branding applied (logo, colors, custom URL)
- Support channel confirmed (24/7 follow-the-sun support included with all subscriptions)
The Classe365 Admin Dashboard: Your LMS at a Glance
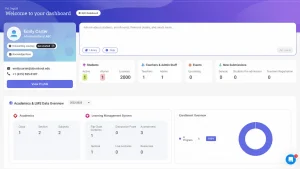
When you log into Classe365 as an administrator, the dashboard opens with a full institution snapshot. The LMS numbers sit inside it, in the “Academics & LMS Data Overview” panel.
Here’s what’s on screen:
- Profile card (top left): the logged-in administrator’s name, role, and institution, with quick links to Onboarding Journey, Knowledge Base, and View Profile.
- AI assistant bar (top right): a prompt field for natural-language questions like “how many students enrolled this term,” with Library and Help shortcuts alongside it.
- Top-line counts: Students (Active vs. Alumni), Teachers & Admin Staff, Events, and New Submissions (broken down by Generic, Students Pre-admission, and Teachers Registration).
- Academics & LMS Data Overview, filterable by academic year, split into three panels:
- Academics: Class, Section, and Subject counts
- Learning Management System: Flip Class Contents, Discussion Posts, Assessments, Quizzes, Live Lectures, and Resources, each with a live count
- Enrollment Overview: a donut chart showing enrollment status (In Progress, 100% in this example)
Reports Overview
The reports section covers institution activity across a set date range, filterable by:
- Today
- Last 7 days
- Last 1 month
- Last 2 months
- Last 3 months
- Custom
Each report type breaks down separately:
-
New Students
To add a student, click “Add Students” from the Students list. A form opens with five sections:
- Enrollment: Select the Academic Session, Class, and Section. Click “Add Enrollment” to enroll the same student into a second class or section if needed.
- Academic Details: Enter First Name, Last Name, and Admission No.
- Personal Information: Enter Student Email, Date of Birth, Student Contact, Gender, and Blood Group. Only date of birth, student contact, and gender are required.
- Skills & Social Details: optional fields for Profile Summary, Skills, Facebook Link, and LinkedIn Profile Link.
- Additional Details: optional fields for Address, Zip Code, State, Country, Father’s Name, Mother’s Name, Parent Contact, and Parent Email.
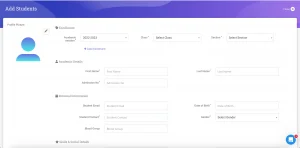
You can also upload a profile picture from the top of the form. Once every required field is filled, click Save.
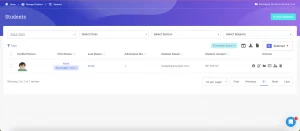
Once submitted, the student appears in the Students list with their profile picture, name, class and section tag (Basic English – Level 1, in this example), admission number, email, and contact number. Each row gives you quick actions to view, edit, manage documents, generate an ID card, assign a guardian, or delete the record.
The list itself filters by Academic Session, Class, Section, and Subjects, and supports enrollment status filtering, column selection, export, and bulk selection across records.
-
Attendance
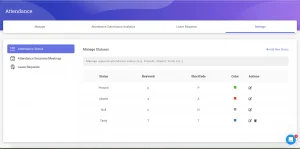
Attendance sits inside the LMS. From the learner journey map, go into Modules under the learning management system to find it.
Setting up the structure:
- Standardize attendance statuses first: add each status (Present, Absent, Tardy, or any custom status), assign a short code, and pick a color.
- For any partial status, set a percentage split; for example, “Late” can be marked 50% absent and 50% present.
- Choose whether attendance is taken by subject or by session, and select multiple sessions if needed.
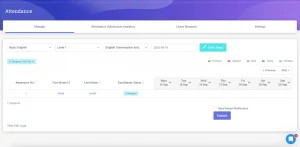
Taking attendance:
- Go to Manage Attendance and select the cohort.
- If subject-wise attendance is enabled, select the subject. Without it, only daily attendance is available.
- The student list loads with a status field for each. Mark all as Present in one click, then adjust individual students: mark someone Absent, another Tardy, with an optional note like “late by 30 minutes.”
- Before submitting, choose whether to send attendance notifications by email, SMS, or WhatsApp, and to whom (students, parents, or both).
- Submit. The record updates immediately and shows up under that student’s profile for the specific subject.
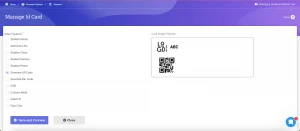
QR code or barcode scan
- Generate a student ID card with a built-in QR code or barcode.
- The teacher opens the Classe365 mobile app on their phone.
- The teacher scans the student’s ID card using the app’s scanner.
- The system reads the code and automatically logs the student as present, with no manual entry required.
- Attendance updates in real time and reflects under the student’s profile the same way manual entry does.
Student Recruitment & Forms
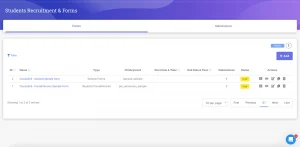
Recruitment and admissions sit at the very start of the LMS implementation process for universities, since this is where student data first enters the system. Access it through Modules under CRM, Enroll & Forms.
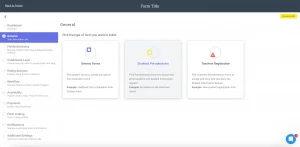
Step 1: Choose the form type
There are three form types available:
- Generic forms: for feedback, evaluations, or contact forms, a direct replacement for Google Forms, Jotform, or SurveyMonkey.
- Admissions, enrollment, and re-enrollment forms: the core form used to bring students into the system.
- Teacher registration forms: for onboarding new faculty.
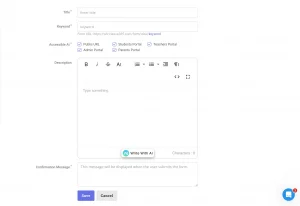
Step 2: Set up the basic form details
- Add a title and keyword, the keyword becomes part of the public-facing form URL.
- Choose whether the form is public or private (requiring students, parents, or admins to log in).
- Add a confirmation message and description.
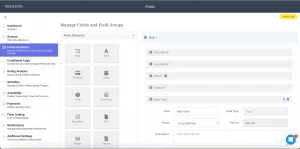
Step 3: Build the form
- Open the drag-and-drop form builder.
- Add fields using available elements: text, long text, date, selection box, checkbox, document upload, and signature.
- For feedback-style forms, add rating scales, opinion scales, or net promoter score fields.
Step 4: Add conditional logic (optional)
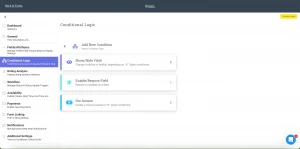
- Set rules so specific fields appear only when certain other fields are selected.
Step 5: Build the workflow
- Create a custom workflow with stages (for example: Pending, Interview, Enrollment Agreement, Admission Denied, Enrolled).
- Color-code each stage for visual tracking.
Step 6: Set availability and payment
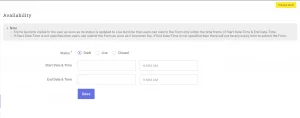
- Define the time window during which the form stays live.
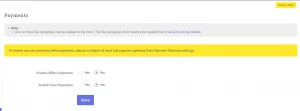
- Attach fees from the fee and invoicing module, marking each as mandatory or optional.
Step 7: Link forms (optional)
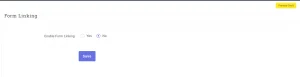
- Use form linking to connect a lead form to an application form, or an application form to a reference check, useful for higher education LMS setups where a reference check precedes enrollment.
Step 8: Configure notifications
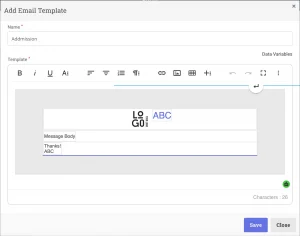
- Create an email template.
- Trigger it at specific workflow stages.
- Set recipients (administrators, students, or both).
Step 9: Set advanced settings
- Add terms and conditions.
- Enable status check, so applicants can enter their submission ID and receive their application status by email.
- Add custom CSS, Google Analytics, or marketing codes if needed.
- Copy the embed code to add the form to an external website.
One limitation worth flagging in an LMS implementation plan: if you embed the form on an external site, only Stripe and Authorize.net are supported for online payments.
Step 10: Track submissions
- Once submitted, view all applications in Grid, List, or Kanban view.
- Click any application to see student details, notes, attachments, linked submissions, fee payments, and other related submissions.
- Assign tasks (calls, emails, follow-ups) to team members from the same screen.
Step 11: Enroll the student
- Once approved, click Enroll.
- Confirm or update the selected course.
- Send login credentials to the student or parent by email.
- Submit. The student’s data now appears in the student information system automatically, with their original submission still accessible from their profile.
Fees & Invoicing
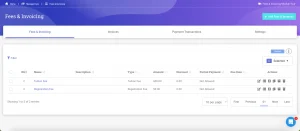
Step 1: Create a fee category
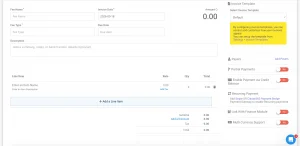
- Go to Fees & Invoicing and click Add Fees & Invoices.
- Enter the Fee Name (this can also function as a fee template, for example, “Term One Fees” or “Tuition Fee”).
- Set the Fee Type, Invoice Date, and Due Date.
- Add a Description, notes, or bank transfer details if needed.
Step 2: Add line items
- Click Add a Line Item.
- Enter the item name, rate, and quantity. The total calculates automatically.
- Add tax to any line item using Add Tax; applicable taxes appear as a selectable list.
- Add multiple line items if the fee covers several charges.
Step 3: Apply discounts
- Use Add a Discount to apply a percentage or flat discount to the entire invoice.
- Alternatively, add a discount as a negative line item, useful for scholarships (for example, entering -300 as its own line).
Step 4: Choose an invoice template
- Select from existing invoice templates in the Invoice Template panel, or build a custom one under Settings > Invoice Templates.
Step 5: Add payers
- Click Add Payers.
- Choose how to apply the fee: to an entire cohort (for example, all Bachelor of Business students), to all students enrolled in a specific subject, to individual students, or to prospective students still sitting in the CRM who haven’t enrolled yet.
- For institutions working with education agents, invoice agents directly through the agency module.
Step 6: Configure payment options
- Toggle Partial Payments if students should be allowed to pay in installments.
- Toggle Enable Payment via Credit Balance to let students apply existing credit to this invoice.
- Toggle Recurring Payment for subscription-based billing (for example, a monthly invoice running for 12 cycles), and set whether the cycle starts on payment or on the due date. This requires Stripe or the Classe365 Payment Bridge.
- Toggle Link With Finance Module to sync the invoice as a debit or credit entry, or connect to Zoho or QuickBooks for chart-of-accounts syncing.
- Toggle Multi Currency Support if invoicing across currencies.
Step 7: Save and send
- Save the fee category or template.
- The invoice is generated for the selected payers and becomes visible under both the Invoices tab and the specific fee category.
Step 8: Track and manage invoices
- Open any fee category and use Filter to view invoices by status (for example, all unpaid invoices).
- Send email notifications directly from this view.
- Export invoice data, including any custom student fields, to Excel or CSV.
- If subscriptions are enabled, view them under the Subscriptions tab, showing total cycles, what’s paid, and what’s upcoming.
Step 9: Record a payment
- Select an invoice and click Add Payment.
- For manual payments (cash or check), enter the check number and payment date, then send a receipt.
- For in-person card payments, use the virtual terminal (requires an integrated payment gateway).
- Apply any available credit balance toward the payment if applicable.
Step 10: Manage credit balances and refunds
- From a student’s profile, open the Fee & Invoicing tab to view a summary of paid and unpaid invoices, and download a full statement.
- Add a credit balance directly to a student’s profile from this screen.
- For paid invoices, use the refund option to process full or partial refunds, adding a reason and notes.
Fund Raising
Access this under Fundraising > Campaigns, split into three tabs: Campaigns, Donors, and Payment Transactions.
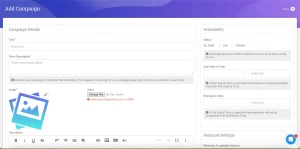
Creating a campaign:
- Click Add Campaign.
- Enter the campaign title and description.
- Upload an image or video, and crop the image to size if needed.
- Format the description using the rich text editor.
- Set the campaign live, along with start and end dates and a funding goal.
- Enter Stripe keys to enable payments.
- Choose whether to display donors publicly and enable social media sharing.
- Save.
Managing a live campaign:
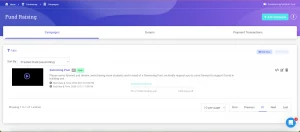
- View the campaign dashboard to see how it appears to the public: image, description, FAQs, and funding progress (0 raised, 0% of goal, days remaining, in this example).
- Donors can pay directly from the campaign page, or an administrator can add a manual payment on their behalf from the dashboard.
- Once you record a donation, funds, donor details, and payments update automatically on the dashboard.
- View the Donors tab to see individual donor contact details and their corresponding payment transactions.
- Generate and print an invoice for any donation, showing the transaction, campaign name, and donor details.
- Embed the campaign on an external site, or delete it, from the same screen.
Notices
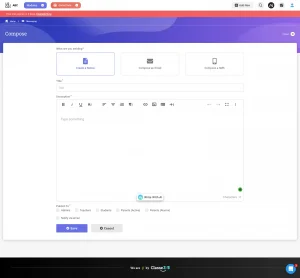
Notices sit under Modules > Messaging, alongside Emails, SMS, and WhatsApp tabs.
Step 1: Start a new notice
- Click Compose.
- Under “What are you sending?”, select Create a Notice (the other options are Compose an Email and Compose an SMS).
Step 2: Write the notice
- Enter a Title.
- Write the Description using the rich text editor; formatting options include bold, italic, underline, alignment, numbered lists, links, images, and tables.
- Use Write With AI if assistance drafting the notice is needed.
Step 3: Set the audience
- Under Publish To, select who receives the notice: Admins, Teachers, Students, Parents (Active), or Parents (Alumni). Multiple groups can be selected at once.
- Toggle Notify via email if the notice should also trigger an email alert.
Step 4: Save
- Click Save to publish the notice.
Once saved, the notice appears in the Notices list with its title, a preview of the description, publish date, and the groups it was sent to (visible as tags, for example, “Admins, Teachers, Students, Parents (Active)”). From this list, administrators can pin a notice, view details, edit, or delete it.
FAQ
How long does a typical learning management system implementation take?
It depends on data volume and how many modules you activate. Classe365 has onboarded institutions with 8,000+ students in about two weeks. Smaller institutions with cleaner data can be live in under a week. The bottleneck is almost always data preparation on the institution’s side, not platform configuration.
Do we need technical staff to implement Classe365?
No. The platform is configured through the admin dashboard, form builders, and settings panels, all browser-based, no coding required. IT involvement is useful for data migration, SSO setup, and payment gateway integration, but a registrar or operations lead can handle most of the configuration.
Can we implement modules in phases instead of all at once?
Yes, and most institutions should. Start with the academic structure, student enrollment, LMS content, and grading. Add fees, fundraising, degree audit, and e-commerce in later phases. Classe365 lets you enable and disable modules individually, so nothing is forced on you before you are ready.
What data do we need to prepare before starting?
At minimum: student records (names, IDs, contact details, enrollment data), the academic structure (programs, classes, sections, subjects), and grading scales. Fee templates and teacher records come next. Export these from your current system and clean duplicates before importing.
Does Classe365 support migration from other LMS platforms?
Yes. The platform integrates with Canvas, Moodle, and Google Classroom, and supports bulk data import via templates. The Classe365 team provides migration support as part of onboarding.
What is the biggest LMS implementation challenge for universities?
Faculty adoption. The platform configuration is straightforward. Getting 50+ faculty members to shift from email and spreadsheets to a structured LMS requires a live walkthrough, a focused starting point (usually the gradebook or content builder), and patience. Rolling out one module at a time works better than a full-system launch on day one.
Can we customize the platform terminology?
Yes. Under Organization Settings, you can rename default terms (teachers to professors, subjects to courses, classes to programs) to match your institutional vocabulary. Do this during setup, before users see the default labels.
Is training included with the subscription?
Every Classe365 subscription includes 24/7 support and access to deep-dive module walkthroughs on YouTube. The team also runs onboarding sessions for new institutions. For more on what the onboarding experience looks like, see our Classe365 demo walkthrough.